In this guide, you will learn how to fit your new screw ring to your WiFi reel in two simple steps.
The screw ring is a small, 3D printed ring which fits the connector of your WiFi reel.
Once in place, it will ease the fixation and removal of the connector to the drone.
Follow the instructions below to get started:
STEP 1 – USING THE RIGHT SCREWRING
If you are reading this, you have received two screw rings.
While they may look similar, each is made for a specific type of connector.
To find out which type of connector you have, watch carefully the image below.
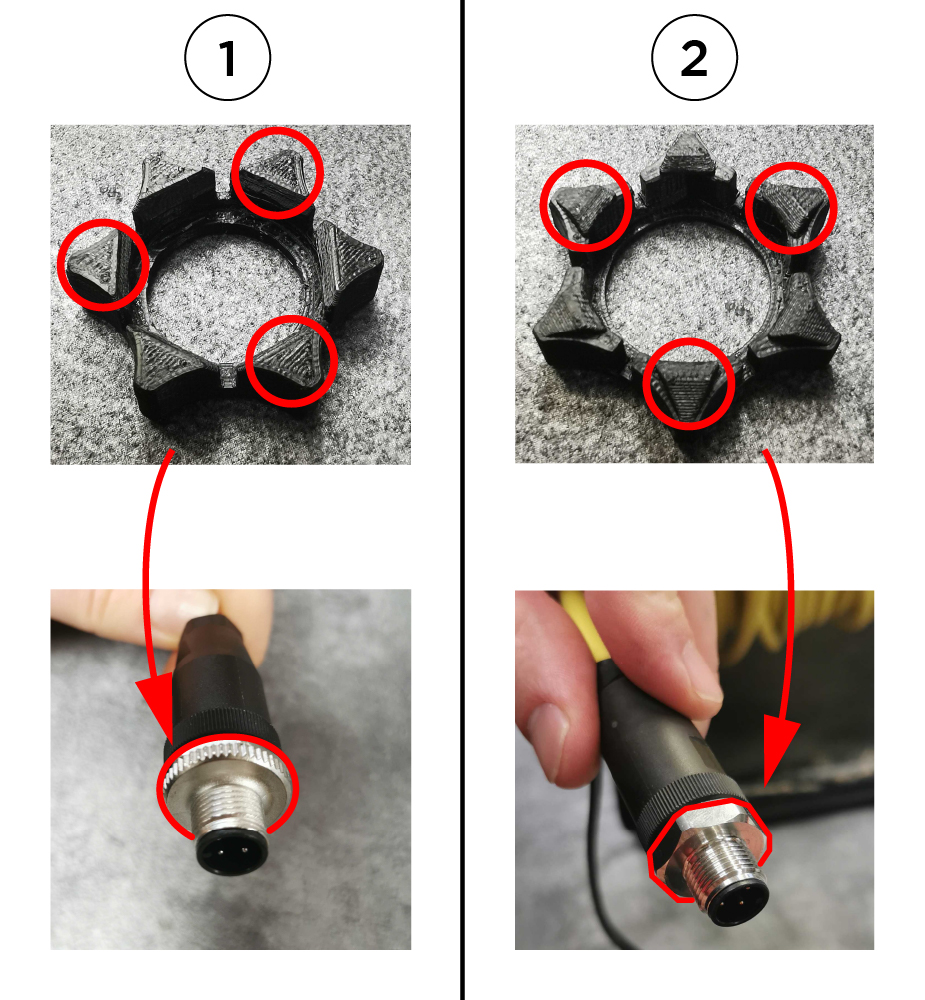
If your connector has a circular base, use the screw ring without additionnal triangles on top of it, noted ①(1) on the picture above.
To fit this screw ring to your connector, please refer to Step 2.a.
If your connector has an angular base, use the screw ring with additionnal triangles on top of it, noted ②(2) on the picture above.
To fit this screw ring to your connector, please refer to Step 2.b.
STEP 2.a – CIRCULAR CONNECTOR
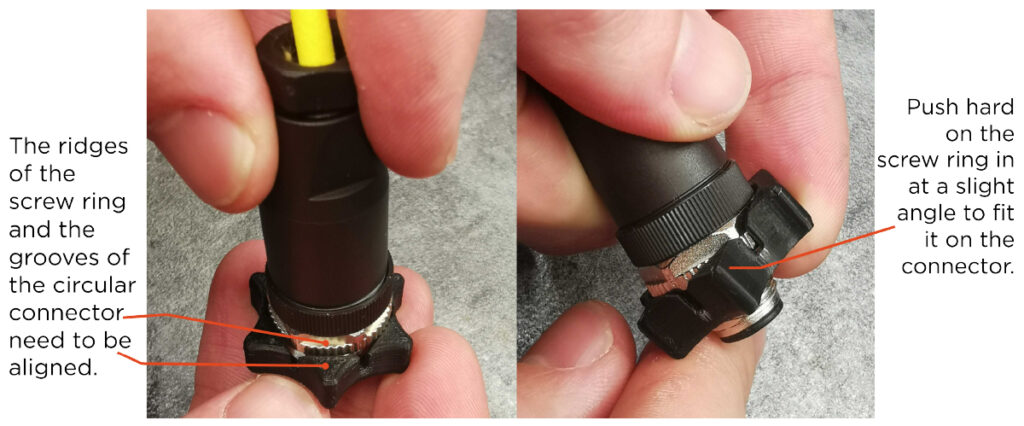
Hover your mouse over the image to zoom in.
Make sure to apply sufficient force on the ring to fit it over the the ridges.
Once the ring is in place, you’re all done!
STEP 2.b – ANGULAR CONNECTOR
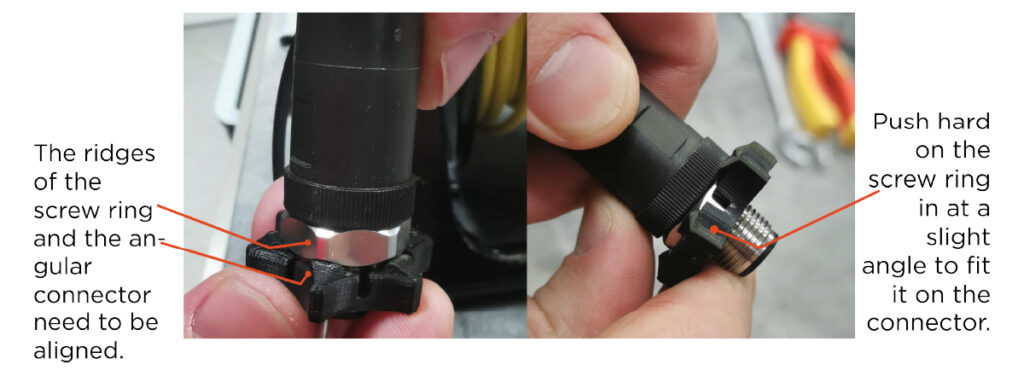
Hover your mouse over the image to zoom in.
Make sure to apply sufficient force on the ring to fit it over the the ridges.
Once the ring is in place, you’re all done!